Create a dynamic distribution list
In a dynamic distribution list you add contacts based on rules relating to information saved in their Whispir profiles. The list of contacts updates automatically if those specified details change in any profiles. For example, if you add contacts based on a specific role (such as ‘trainer’) and a contact moves to a different role, the list will exclude that contact when the message is sent.
Note: You can’t use the message escalation feature in a message being sent to a dynamic distribution list.
Enter the list’s basic details
- Ensure that the required workspace is on the Workspace toolbar.
- Hover your mouse over the workspace to open the Workspace menu.
- Under Contact Management click New Distribution List.
The New Distribution List page opens. - (mandatory) In the Name field enter a name for the list.
- In the Description field enter a description for the list.
It should provide more information about the purpose of the list and its recipients.
Choose a meaningful name. Distribution lists are identified by their name alone, so the name should easily identify the purpose of the list and who might be on it.
Tip! Make sure you don’t add any spaces at the end of the name and don’t include any special characters (for example, & or _).
- In the Type field select Dynamic.
- If you want the distribution list’s location to display on the Whispir map (if the Maps module has been enabled) click the Add a location to this Distribution List link.
See Add a location to a distribution list for more information. - Go to Add rules to determine recipients.
Tip! To use this setting effectively ensure that all the contacts on the distribution list are actually based in the location you select.
Add rules to determine recipients
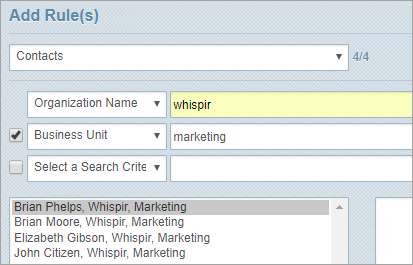
You use the Add Rule(s) section to determine which contacts will be included on the distribution list, based on matching the criteria you select to information saved in contact profiles.
- In the first field in the Add Rule(s) section note that Contacts is selected automatically.
- Select a search criterion and type the required value in the field beside it.
For example, you may want to include in your list any contacts who have ‘Whispir’ set as their organisation in their Whispir profile. - To help you further narrow your search you can add more criteria:
- In the next blank field select your next criterion and type the required value in the field beside it.
- Select the check box beside the field to indicate you want to apply this criterion.
- Click
 to add more fields if required.
 - Click Search.
Tip! You can add multiple terms, separated by commas, to a field beside a criterion field. For example, entering ‘Whispir, ACME Inc’ when you select Organisation Name returns contacts with either of these values in their profile.
- Click Save.