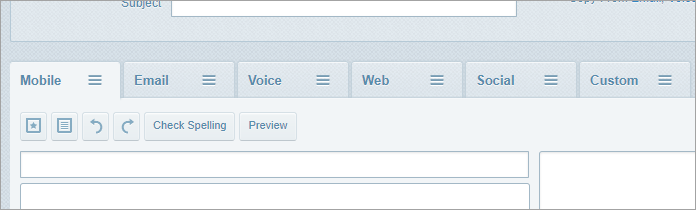
Use the message toolbar functions
This topic relates to Whispir’s ‘classic’ messaging features (not to the Rich Message Studio).
When you’re adding content to a message you can use the functions on the toolbar in most channels (Mobile, Email, Web and so on) to help you prepare it. In the Email and Web channels you can also access rich text formatting functions.
Note: This topic also applies to templates created using Whispir’s ‘classic’ template functionality. See Create a new ‘classic’ template.
Use custom lists
You can add customs lists to your content in most channels (such as Mobile, Email and Web). They are predefined lists of options that help you create content more quickly and consistently.
- Click
 to select an existing custom list.
 - Click
 to add a new custom list or edit an existing one.
See Create, edit and use a custom list for more information about using custom lists.
Undo or redo your changes or preview your message
- Click
 or
or  undo or redo your most recent content changes.
 - Click
 to view how any @@ tags in your content are populated.
Note: Some @@ tags can’t be previewed because they can only be populated as the message is sent. See About @@ tags (at-at tags).
Check the spelling in your draft messages
You can use the Check Spelling function in all message channels to identify mistakes and correct them.
- Click
 on a channel’s toolbar.
Any spelling mistakes in your content are highlighted, and the Check Spelling button label changes to [n] Spelling Error(s). - Click on a highlighted word to view a list of suggested spellings (if any are available) and click the relevant one.
- Click the button again at any time to rerun the spell check.
Apply rich text formatting to message content
You can apply rich text formatting in a message’s Email and Web channels to create a graphically-rich message that uses different fonts, text sizes, colours, tabs and bullet lists. You can also paste rendered HTML into them.
To access the rich text formatting toolbar:
- Ensure you have either the Email or Web channel active.
- Click
 .
.
The rich text formatting toolbar appears.

- Use the Rich Formatting toolbar functions:
| Button group | Button | Action |
|---|---|---|
|
|
|
Format the selected text as bold, italic or underlined. |
|
|
|
Left justify, centre, right justify or fully justify the selected text.
Indent the selected text or move the indented text back to the left. |
|
|
|
Format the selected text as either a numbered list or a bullet list. |
|
|
Change the colour of the selected text. |
|
|
|
Add or change the background colour of the selected text. |
|
|
|
Change the font type to the default sans serif, serif or monospace font. |
|
|
|
Change the font size of the selected text to one of 6 size options. |
|
|
|
Add a word to the dictionary:
|
|
|
|
Add a website link that the message recipient can click to open a particular web page.
Note: The Use shorten URL and link tracking check box is not currently in use. |
|
|
|
Click to open the HTML Content pop-up box and edit the HTML markup or paste valid HTML. Warning! Take care when using this function if you’re not experienced in editing HTML code. |
|
|
|
Clear all formatting from the selected text. |
|
|
|
(The Import Web Content tool is not currently in use.) |
|
|
|
Click to switch back to plain text. Important! Any rich formatting you’ve applied to content will be lost. |