View or edit contact details
You can use the Contact List page to view and edit all contacts and active contacts for the current workspace. You can also view all users who have access to the workspace, although you can’t edit their details here. (User accounts are managed by company administrators on the Manage Users page.)
Note: If your Whispir role is Company Member or Company Guest you may have restricted access to contact details. See Enable contact privacy.
Open the Contact list page and view contacts, active contacts or users
- Ensure that the required workspace is on the Workspace toolbar.
- Hover over the workspace to view the Workspace menu and then click Contact Management.
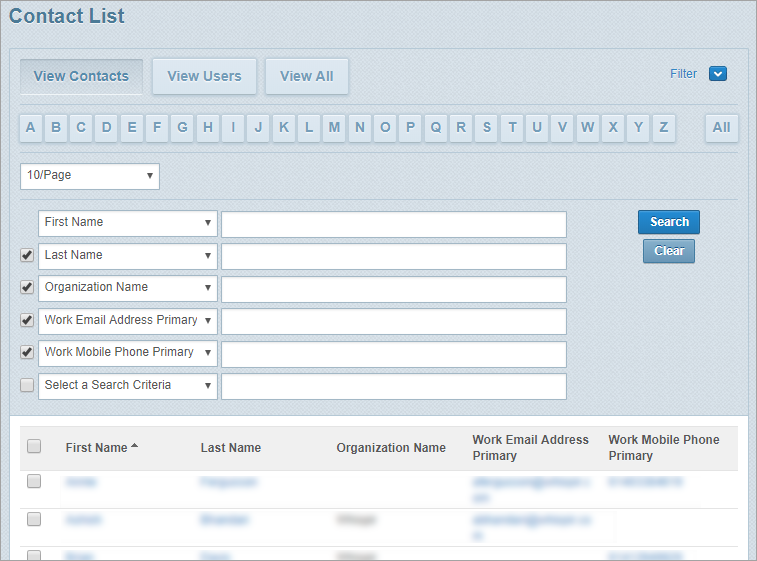
The Contact List page opens at the View Contacts view. - Click the buttons at the top of the page to switch between the contact list’s three views:
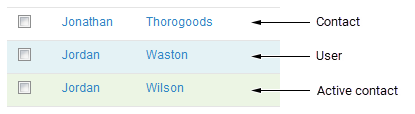
- View Contacts: This is the default view that you see when you open the Contact List page. It shows all contacts and active contacts for the workspace. These may have been created in this workspace or been mapped (shared) from another workspace. Active contacts are shaded green while contacts have no shading (white).
- View Users: This view shows all users (people who have a Whispir user account and can create and send messages) who have access to this workspace. Users are shaded blue.
- View All: This view shows a combined list of the workspace’s contacts, active contacts and users. If a user with access to this workspace is also a contact in the workspace they’re listed twice.
Filter the contact list
Note: You can also use the filters when viewing users on the Contact List page.
If the contact list is very long there are several ways that you can find particular contacts quickly:
- Click a letter along the top of the page to find all contacts whose first name starts with that letter.
- Select a value in the #/Page field to restrict or expand the number of contacts displayed per page.
- Sort the list by clicking any of the column names.
- Click
 to use the filter options to help you find a particular contact or group of contacts. Click Search once you’ve set up your filters.
- Click in a search field, select a search filter option in the list and type a full or partial term in the field beside it.
For example, select First Name and then type ‘John’ in the field next to it to find contacts with the first name ‘John’, or type J to find all contacts with a first name that contains the letter J. - Add multiple terms, separated by commas, to find a series of contacts. For example, select Last Name and then type ‘Smith, Truong, Pinto’ in the field next to it to find contacts with these last names.
- Click in any search field and select a different search criterion to use.
- Once you’ve selected search criteria, you can clear or select the check boxes beside them to hide or show those values as columns in the search results.
- Click in a search field, select a search filter option in the list and type a full or partial term in the field beside it.
Tips!
- In the search criteria fields select Created Time and/or Last Updated Time if you want these values to appear as columns in the search results. This is helpful, for example, when you have duplicate contacts and you want to know when each one was added.
- Click Clear or All to view the full contact list again.
Note: The last search filter you applied is retained. That is, you’ll see the same search results the next time you open the Contact List page until you change the filter.
View contact details
- On the Contact List page find the contact whose profile you want to view.
- In the contact list click either the contact’s first name or last name.
The View Contact page opens and displays all contact profile details. - Click Contact List to return to the list.
Note: You can also view user profiles: Click View Users, find the relevant user and click their first name or last name.
Edit one contact
- On the Contact List page find the contact whose profile you want to edit.
- In the contact list click either the contact’s first name or last name.
The View Contact page opens. - At the bottom of the page click Edit.
The Edit Contact page opens. - Update the contact details as required.
- Click Save.
The View Contact page reopens and you can click Contact List to return to the list.
Tip! Alternatively, on the Contact List page you can select the check box beside a contact and click Edit at the bottom of the page to go straight to the Edit Contact page.
Edit multiple contacts
Note: Certain contact fields (such as first name, last name, username and password) are not available for editing across multiple contacts.
- On the Contact List page find the contacts whose profiles you want to edit.
- Select the check boxes beside the contacts.
- At the bottom of the page click Edit.
- In the warning message that appears click OK to confirm that you want to edit multiple contacts.
The Edit Multiple Contacts page opens. - Update the contact details as required.
- Click Save.
The Contact List page reopens.