Import users to add accounts in bulk
Role: Company Administrator.
The Import Users function lets you add new user accounts in bulk by importing users’ details into Whispir via a .CSV file. Whispir provides a template that contains all the data fields for new user profiles. You download the .CSV file from the Import Users page and then add as many user details as you require, one user per row.
Some rules for preparing the .CSV file
- Do not change any of the column headings. These allow the data to be mapped correctly to the user profile fields in Whispir during the import process.
- At minimum you must enter values for every user in the UserName, FirstName, LastName, WorkEmailAddressPrimary, WorkMobilePhonePrimary and WorkingCountry columns.
- Delete the sample user data in Row 2.
- Ensure you save the updated file in .CSV file format.
Once the data has been successfully imported you can then open the Manage Users page and approve the new accounts individually. See Add a new user and activate their account. You also need to assign the users to the workspaces they’ll need access to. See Assign users to workspaces.
Steps
- Open the Import Users page (click
 > Administration sidebar > Import Users).
Note: Access to the Import Users function is controlled by role permissions. If you can’t see it on the Administration sidebar you need to activate it in the permissions matrix for the relevant company-level role (by selecting the Import check box for User). See Configure role permissions.
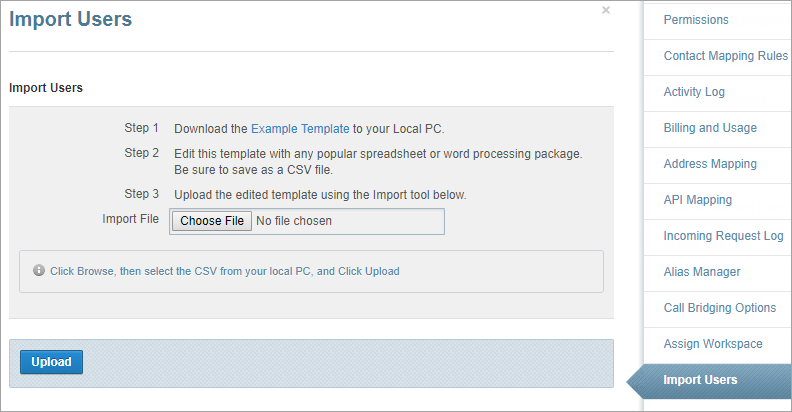
- Click Example Template to download the .CSV template ‘whispir-example-bulk-message.csv’.
- Open the file in Excel and add all the required user details to it.
Refer to the information above for help with preparing the file. - Save the file as a .CSV file with a new name.
- On the Import Users page click Choose File or Browse (depending on the browser you’re using) and then browse for your saved .CSV file.
- Click Upload.
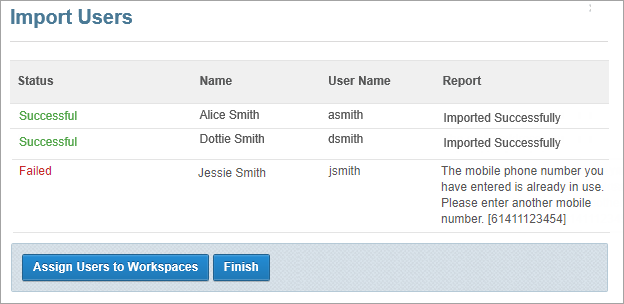
The file is imported and the Import Users page lists the name and import status of each user in the file. All successfully imported users now have a user account and their status is currently Pending.
Note: If the import failed for any users read the information in the Report column, correct the relevant data in the .CSV file and upload the file again.
- If you want to now assign users to workspaces click Assign Users to Workspaces and follow the steps in Assign users to workspaces.
- If you don’t want to assign users yet click Finish.
The Manage Users page opens. You can now proceed to approve each user’s account and then let the users activate their own account. See Method 1 under Approve and activate the pending user.