Set time rules for blackout periods
Role: Company Administrator.
You can set up blackout periods to specify blocks of time when messages won’t be sent. They ensure that your staff, stakeholders or customers only receive messages at a suitable time of day. Blackout periods are applied company-wide – they affect all messages sent from all workspaces.
Some notes about how blackout periods work
- If you send a message during a blackout period the message will be sent as soon as the period ends.
- If you send a message immediately before a blackout period begins the message will be sent regardless of how many recipients there are and how long it takes to send. The send process won’t stop just because the blackout begins.
- Blackout periods are triggered according to the time on the server that’s hosting Whispir. If you’re logged in to Whispir in one time zone but your company’s server is in a different time zone you need to calculate the blackout period times based on the server time.
Note: Setting blackout periods may not be the most flexible solution for your company, particularly as the settings apply across all workspaces. For example, your company might need to send emergency messages at any time of the day. Instead you could consider scheduling the time at which your messages are sent or simply not sending messages at unsuitable times. See About scheduling messages.
Steps
- Open the Company Settings page (click
 > Administration sidebar > Company Settings).
 - In the Settings pane on the left expand Time Rules and click Blackout periods.
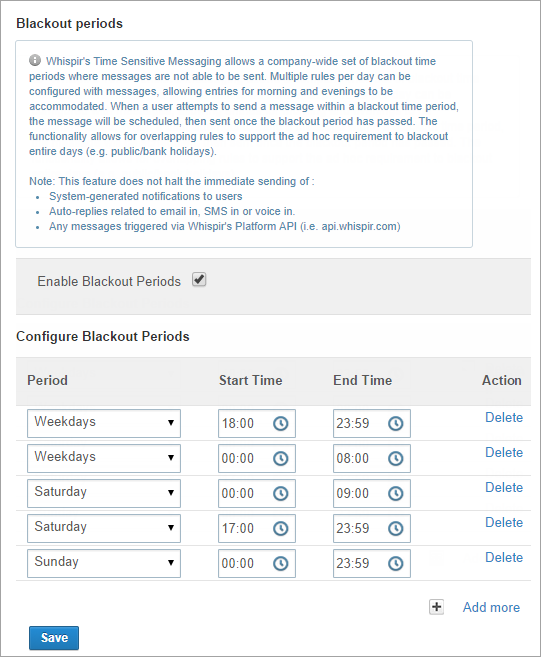
- Select the Enable Blackout Periods check box.
- Click Add more to add a new blank blackout period rule.
- Enter the period, start time and end time.
- Click Add more to add more rules.
- Click Save.
Tip! Add two rules to cover an overnight blackout period: One up till 11:59 pm (23:59) and one from 12:00 am (00:00).