Configure message aliases
Role: Company Administrator.
The Alias Manager lets you configure a list of workspace-specific aliases that can be used in templates and messages. Aliases allow users to send a message with customised sender details (such as your company’s name), which give message recipients additional context about the message. Aliases can be used for mobile (SMS messages and push notifications), email and voice messages, and email-to-SMS messages.
When a user is creating a new message or new message template they have the option of selecting from the list of aliases that you’ve configured in the Alias Manager. If they don’t select an alias Whispir’s default generic phone number and email address are shown to recipients instead.
Note: Additional setup work is required by the Whispir Support Team to enable aliases for the Email and Voice channels.
To learn more about how users apply aliases to messages and templates see Understand a message’s Features tab (for ‘classic’ messages) and Understand a message’s Features settings (for Rich Message Studio messages).
Create an alias
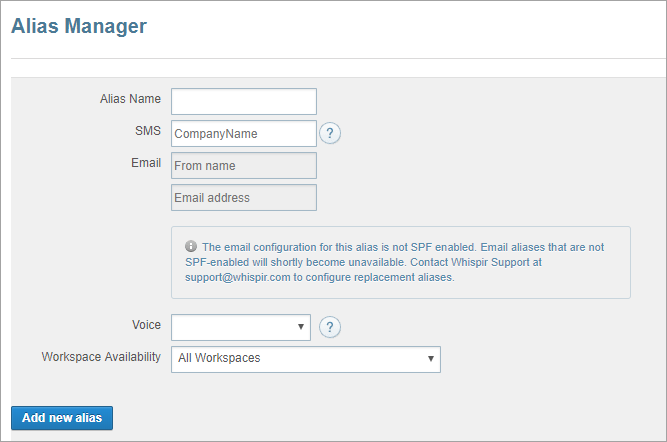
- Open the Alias Manager page (click
 > Administration sidebar > Alias Manager).
 - Enter a name for the alias.
- In the SMS field enter the name or phone number to display to message recipients.
- In the Workspace Availability field select the workspaces that you want the alias to be available in.
- Click Add new alias.
The alias is added to the list.
Note: To configure alias values for the Email or Voice channels contact the Whispir Support Team (support@whispir.com). They’ll work with you to resolve the configuration security issue.
Edit or delete an alias
- Open the Alias Manager page (click > Administration sidebar > Alias Manager).
- Locate the required alias in the list on the page.
- Do one of the following:
- Click Edit, make your changes in the fields at the top of the page and click Save.
- Click Remove to delete the alias, and then click OK in the message to confirm your action.